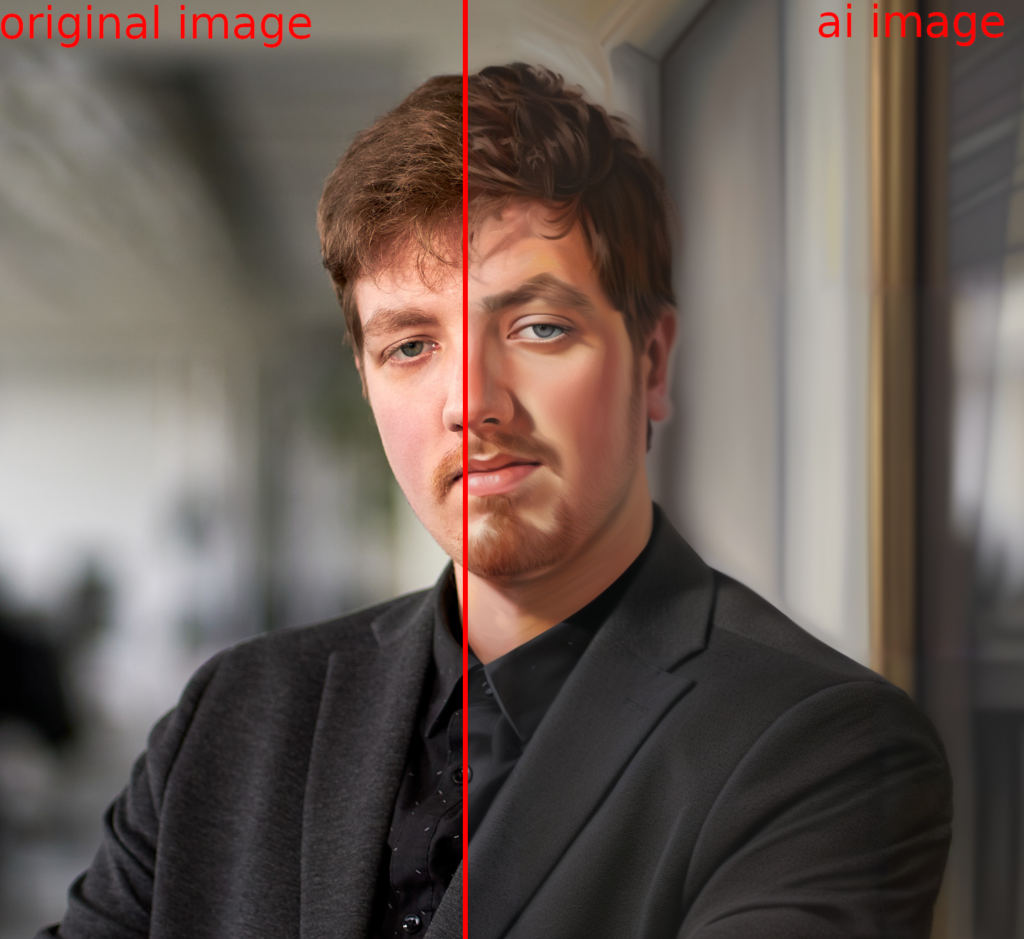
With image generators like OpenAI’s Dall-E 2 and Midjourney, you can create visually appealing images with just a few words. However, if you have an existing image that you want to transfer a new style onto, it becomes a bit more challenging. Fortunately, with the use of local or private cloud AI, you can easily transfer styles onto any image you have. In this short tutorial, I will show you how to transfer a portrait of a person to a set of art styles.
I highly recommend reading the article from DataCamp.com on installing Stable Diffusion WebUI.
Improving the quality of AI-generated images using ControlNet
If you are familiar with Stable Diffusion WebUI, you know that it generates high-quality images. However, sometimes the results may not be exactly what you want or expect. That’s where ControlNet comes into play. With ControlNet, you can fine-tune the generation process and achieve even better results.
What is ControlNet?
ControlNet is an extension for Stable Diffusion WebUI that enables you to control specific aspects of the image generation process. It works by extracting certain features (e.g., contours, depth, or base image) from source images and transferring them onto the generated images. This helps the AI model focus on generating specific details or characteristics of the desired image.
How to use ControlNet?
To use ControlNet, follow these steps:
1. Install the ControlNet extension: Go to the Extension tab in Stable Diffusion WebUI and select “Load from.” Find the “sd-webui-controlnet” extension and click “Install.”
2. Download the required models: Tile and Lineart. Place these models in the extensions/sd-webui-controlnet/models folder inside the Stable Diffusion WebUI directory.
3. Enable multi-ControlNet: Go to Settings > ControlNet and increase the value of the Multi ControlNet slider to 2. This will allow you to run two ControlNet models simultaneously.
4. Generate an image: Choose an appropriate prompt and generate an image.
5. Configure ControlNet: For each ControlNet model, specify the source image path and the type of feature extraction (contours, depth, or base image).
6. Adjust the balance between stability and fidelity: The Balance parameter determines the tradeoff between maintaining the original image structure and achieving detailed features. Lower values prioritize structure, while higher values emphasize detail. You can adjust this parameter in the individual ControlNet configurations.
Transferring style
To transfer the style onto your image of choice, you need to go to the tab labeled ‘img2img’. Drag your desired image into the canvas, then set Denoising to 0.50.
Next, set Resize Mode to ‘Crop and Resize’. Then, go to ControlNet and click on the radio button labeled ‘Tile’. Enabling this model will turn on the ControlNet Tile Model.
Go to ControlNet Unit 1 and select LineArt as your Image Style. Select ‘LineArt_Realistic’ from the dropdown menu for Preprocessor, which will set the preprocessor to create realistic representations of contours instead of creating lineart over everything. Enable this model.
Finally, go back to the top and use this prompt to create an oil painting of yourself: For this generation, I got this image back:
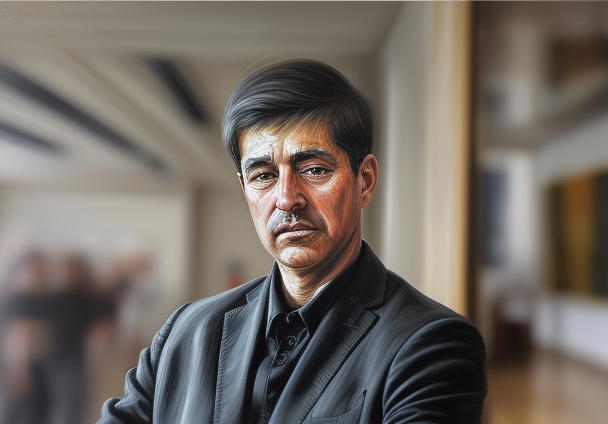
In my case, it got close, but it changed me to much. It turned me 40 years older and it added details that did not exist.
This is where the human work comes in. Now, all you have to do is tweak the denoise you changed earlier to try and get the result you want.
In my case and maybe in your case to, this did not work. If that is the case, keep on reading.
The classic old tale of more data
In my case, the failure was due to reducing the amount of information in the source image. We reduced a 2000×2000 pixel image to a 512×512 pixel image, destroying half of the total data. Of course it is going to have difficulties running it then! But how to we fix this?
All we need to do is make sure the AI can see all the pixels. The ‘SD Upscale’ extension allows us to use each pixel of the base image as a reference rather than requiring additional memory.
To install it, go to Extensions, Installed, and find ‘Ultimate-Upscale-for-automatic1111‘. Download and restart the server.
Repeat the previous steps. When done, go to Resize to and choose Resize by. Set it to 1. Then go to the bottom and choose Script and select ‘Ultimate SD Upscale’. Finally, click Generate. This process may take longer, so give it some time. After approximately one minute, I got the following image back.
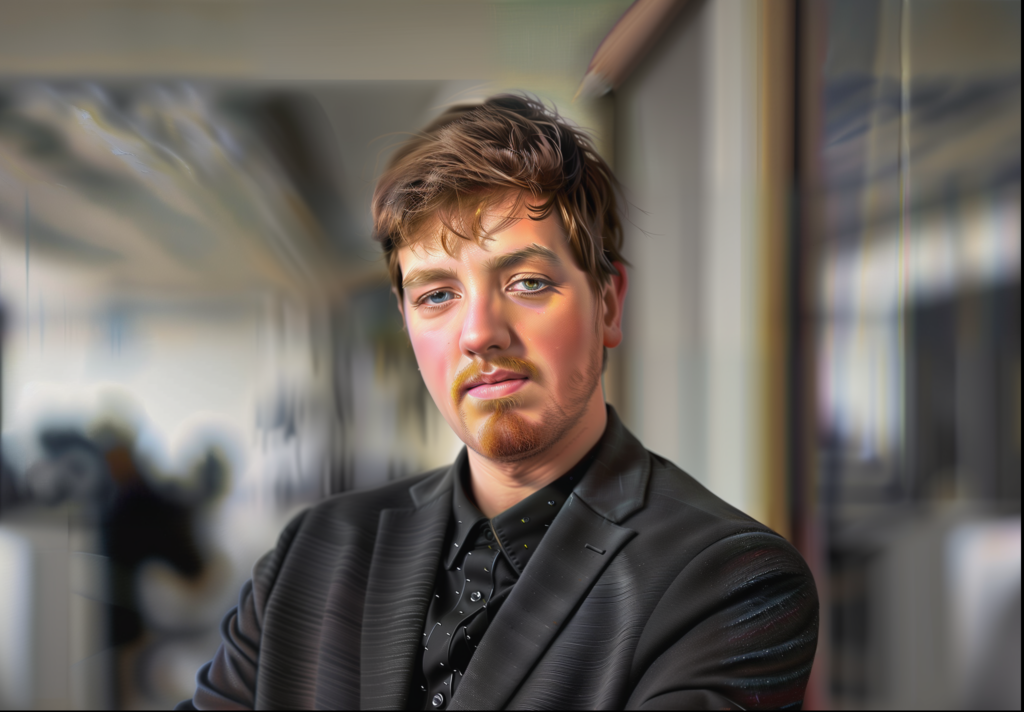
After a few seconds of image generation, I get the following image back. Just as the doctor ordered. Experimenting with different styles and controlnets can create near endless possibilities for artistic expression. Don’t hesitate to try it out!
Use cases of this AI workflow
Here are some ideas of what you could do with this AI workflow to create a unique experience for yourself or your clients.
1. Personalized photos: You can use this AI workflow to create unique and memorable images of yourself or loved ones by incorporating various artistic styles into your portrait. A company I work with does wonderful work with this (www.wesmilebooth.nl)
2. Marketing materials: Whether it’s an advertisement, brochure, or website design, incorporating distinctive visual elements can help make your brand stand out from the competition.
3. Artistic expression: This technology allows artists to explore new creative avenues by combining their own artwork with that of others in unexpected ways.
4. Education: Students can learn about different art movements and eras through hands-on experimentation with this AI workflow.
5. Historical preservation: By digitizing old photographs and paintings using this technology, we can ensure that these valuable pieces of history don’t get lost over time.
These are just a few examples of how this AI workflow can be applied across different industries and disciplines. As with any emerging technology, there will undoubtedly be even more innovative uses as developers continue to push the boundaries of what’s possible.
If you are interested in the possibilities of image generation for your company, feel free to contact me for a quick demo!